Table of Contents
ToggleTracking your conversion rate is a key step in measuring the effectiveness of your website or online business. In Google Analytics 4 (GA4), conversion tracking has shifted to a more event-based approach. This article will guide you through the entire process of finding, tracking, and optimizing your conversion rate using GA4.
What is Conversion Rate?
Conversion rate refers to the percentage of users who take a desired action on your website, such as making a purchase, signing up for a newsletter, or filling out a form.
Conversion rates are an essential performance metric, revealing the effectiveness of your marketing efforts and the user experience on your website. A high conversion rate means your strategies are working, while a low one signals the need for optimization.
Key Conversion Metrics to Monitor
Some important metrics to watch for in GA4 include:
- Session Conversion Rate: The percentage of sessions that resulted in a conversion.
- User Conversion Rate: The percentage of users who completed a conversion.
- Ecommerce Conversion Rate: Specific to ecommerce sites, measuring the percentage of users who made a purchase.
You are only a step away from skyrocketing your business!
Analytics can help you monitor the most useful trends concerning your business. We help you find those trends!
Overview of Google Analytics 4 (GA4)
GA4 is the latest version of Google Analytics, focusing on user-centric data and event-based tracking. It provides a more in-depth understanding of user behavior across multiple platforms.
While Universal Analytics relied heavily on session-based tracking, GA4 introduces an event-based model, which provides more flexibility in tracking user interactions.
GA4 allows you to track almost any interaction as an event. Events include page views, button clicks, form submissions, and more, which makes conversion tracking more versatile.
Setting Up Conversion Tracking in GA4
Setting up conversion tracking in Google Analytics 4 (GA4) is essential for understanding how well your website drives desired user actions. Here’s a detailed, step-by-step guide to ensure you cover every aspect of the setup process.
- Create a GA4 Property
- Log into Google Analytics: Navigate to the Google Analytics homepage and sign in.
- Create a New Property:
- Click on the Admin gear icon at the bottom left.
- In the Property column, select Create Property.
- Fill in your property name, reporting time zone, and currency.
- Click Next to select your industry category and business size, then click Create.
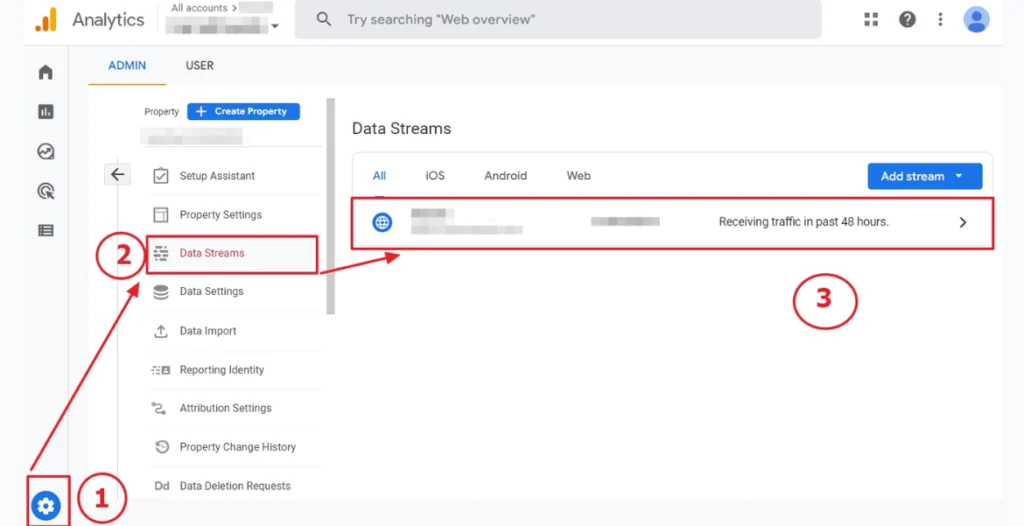
- Set Up Data Streams
- Add Data Stream:
- After creating your property, you’ll be prompted to set up a data stream.
- Choose either Web or App based on your needs. For websites, select Web.
- Enter your website URL and stream name.
- Click Create Stream.
- Copy Measurement ID: You will see a measurement ID (formatted as G-XXXXXXXXXX). Copy this for later use in your tracking setup.
- Add Data Stream:
- Configure Enhanced Measurement
- Enhanced Measurement Settings: GA4 offers enhanced measurement features for automatic tracking of certain events, such as page views and scrolls.
- In the data stream settings, ensure that the toggle for enhanced measurement is enabled.
- Customize what you want to track (e.g., scrolls, outbound clicks).
- Set Up Conversion Events
- Access Events:
- In the GA4 Admin panel, navigate to the Events section under the Configure column.
- Create a New Event:
- Click on Create Event.
- Enter a name for your event (e.g.,
purchase,signup). - Specify the parameters you want to track (e.g.,
event_category,event_label). - Click Create.
- Mark as Conversion:
- Find the newly created event in the events list.
- Toggle the switch to mark this event as a conversion.
- Access Events:
- Use Google Tag Manager (GTM) for Custom Events
If you need to track specific interactions that aren’t automatically tracked, you can set up custom events using GTM.
- Set Up GTM:
- If you haven’t already, create an account at Google Tag Manager.
- Create a new container for your website.
- Install GTM on Your Website:
- Follow the instructions provided by GTM to add the code snippets to your website’s header and body.
- Create a New Tag:
- In GTM, click on Tags > New.
- Select Tag Configuration > Google Analytics: GA4 Event.
- Choose your GA4 configuration tag or create a new one if necessary.
- Name your event (e.g.,
button_click,form_submission).
- Set Trigger:
- Click on Triggering and select an existing trigger or create a new one based on user actions (like clicks or form submissions).
- Save the tag.
- Publish Changes: Once everything is set, click Submit to publish your changes.
- Set Up GTM:
- Verify Event Tracking
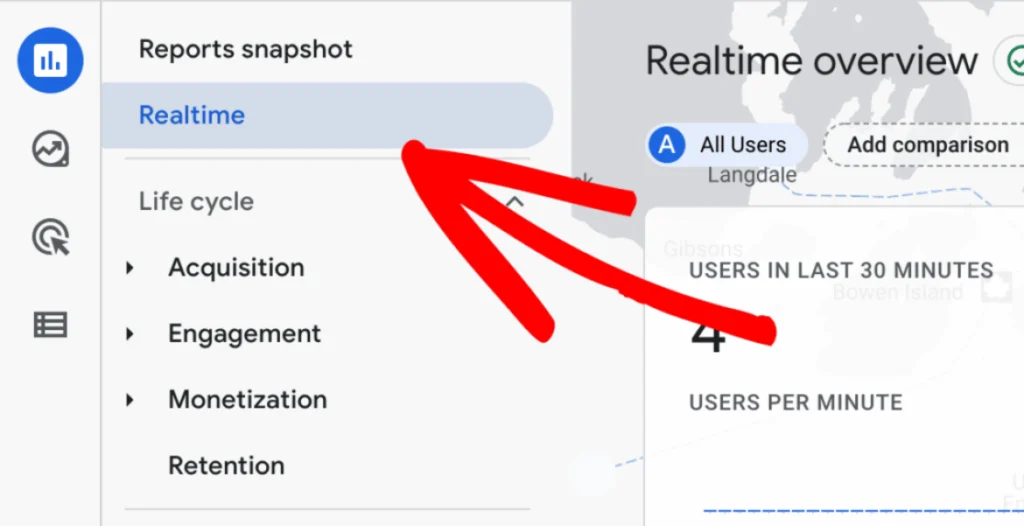
- Use GA4 Real-Time Report:
- Navigate to Reports > Real-Time in your GA4 dashboard.
- Perform the action you are tracking (e.g., complete a purchase or submit a form).
- Check the real-time report to confirm that the event is firing correctly.
- Debugging with GTM Preview Mode:
- In GTM, click on Preview to enter debug mode.
- Visit your website with the debug mode active.
- Perform the actions you want to track and check if the corresponding tags are firing correctly.
- Use GA4 Real-Time Report:
- Monitor Conversion Events
- Access Conversion Reports:
- After setting up your conversions, you can view performance by navigating to Reports > Engagement > Conversions in GA4.
- Analyze the data to assess conversion performance over time.
- Access Conversion Reports:
- Refine and Optimize Conversion Tracking
- Regularly Review Events:
- Regularly check your events and conversion tracking settings to ensure they align with your marketing goals.
- Adjust Based on Insights:
- Use insights gained from GA4 reports to refine your events and improve your conversion strategies. Experiment with A/B testing and adjust event tracking based on user behavior.
- Regularly Review Events:
How to Find Conversion Rate in GA4
Finding your conversion rate in Google Analytics 4 (GA4) involves accessing specific reports, filtering data, and understanding different conversion metrics. Here’s a detailed breakdown of each step.
Step 1: Ensure Conversion Tracking is Set Up
Before you can find your conversion rate, confirm that conversion tracking is properly set up in GA4.
- Navigate to Events:
- Log into your GA4 account.
- Go to Admin > Property > Events.
- Mark Events as Conversions:
- Look for the events you want to track as conversions (like purchases or form submissions).
- Toggle the event to mark it as a conversion.
Step 2: Access the Reports Section
To find your conversion rate, you’ll primarily work within the Reports section of GA4.
- Open the Reports:
- From the GA4 dashboard, click on Reports on the left sidebar.
- Select Engagement:
- Under Engagement, click on Events. This will show you all the events tracked in your property, including those marked as conversions.
Step 3: View Conversion Data
Now that you have access to your events, you can view specific conversion data.
- Filter for Conversion Events:
- In the Events report, use the filter option to view only those events that have been marked as conversions.
- This will help you focus specifically on the actions you want to analyze.
- Analyze Conversion Metrics:
- Look at the Conversions column to see how many conversions each event has triggered.
- You can also see metrics like Total Users, Sessions, and Event Count.
Step 4: Calculate Conversion Rate Manually
GA4 doesn’t provide a direct conversion rate metric, but you can calculate it using the data you have.
- Gather the Necessary Metrics:
- Note the total number of conversions (from the Conversions column).
- Note the total number of sessions or users (depending on which conversion rate you want to calculate).
- Use the Formula:
- For Session Conversion Rate: Conversion Rate=(Total ConversionsTotal Sessions)×100\text{Conversion Rate} = \left( \frac{\text{Total Conversions}}{\text{Total Sessions}} \right) \times 100Conversion Rate=(Total SessionsTotal Conversions)×100
- For User Conversion Rate: Conversion Rate=(Total ConversionsTotal Users)×100\text{Conversion Rate} = \left( \frac{\text{Total Conversions}}{\text{Total Users}} \right) \times 100Conversion Rate=(Total UsersTotal Conversions)×100
Step 5: Use the Analysis Hub for Deeper Insights
For a more nuanced understanding of your conversion rates, leverage the Analysis Hub.
- Navigate to Explore:
- Click on Explore on the left sidebar.
- Create a New Exploration:
- Start a new exploration by selecting a blank template.
- Add Dimensions and Metrics:
- Drag and drop relevant dimensions (like event names) and metrics (like conversions) into your exploration.
- Consider segmenting your data by traffic source, user demographics, or device type to gain insights into which segments convert best.
- Visualize Data:
- Use charts and tables to visualize your conversion data. This can help you identify trends and patterns.
Step 6: Compare Conversion Rates Across Timeframes
Understanding how your conversion rate changes over time can provide valuable insights.
- Select a Date Range:
- At the top right, choose a date range for your report. Compare short-term and long-term performance.
- Look for Trends:
- Analyze if there are peaks or drops in your conversion rates. Investigate what might have caused these changes (e.g., marketing campaigns, website changes).
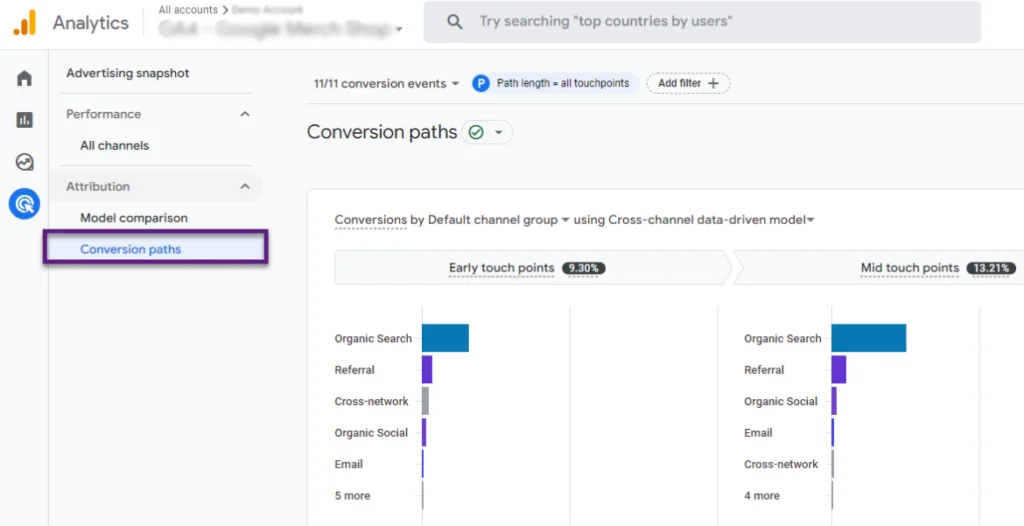
Step 7: Review Conversion Paths
GA4 offers the ability to see the paths users take before converting.
- Access User Explorer:
- Navigate to Explore > User Explorer to see individual user journeys.
- Identify Conversion Paths:
- Look for common paths users take before completing a conversion. Understanding these paths can inform your optimization strategies.
Step 8: Utilize the DebugView for Real-Time Testing
If you’re setting up new conversion events, use the DebugView to ensure they’re firing correctly.
- Open DebugView:
- In the GA4 interface, go to Configure > DebugView.
- Test Events:
- Perform actions on your website that should trigger conversions. You can see in real-time whether the events are firing as expected.
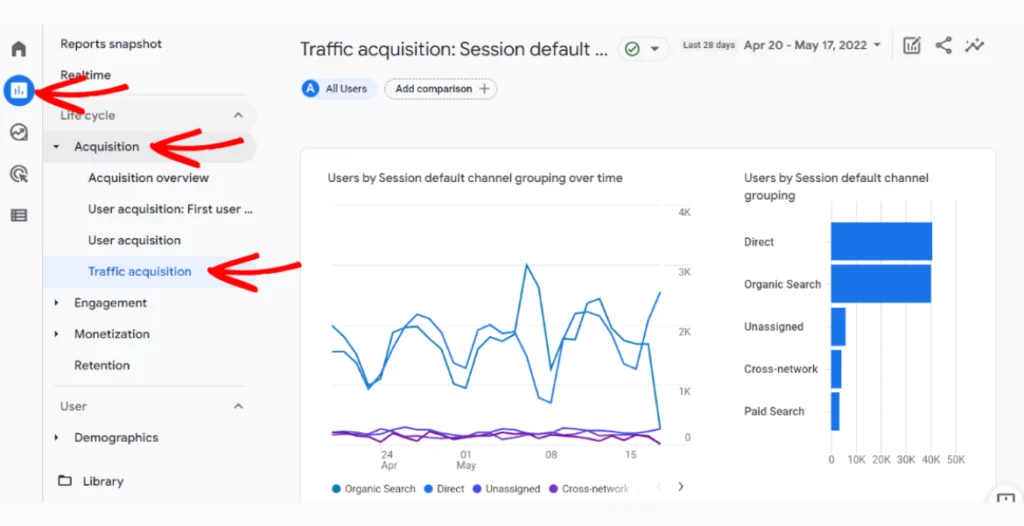
Optimizing Conversion Rate in GA4
Improving your conversion rate is essential for maximizing website effectiveness. Here’s how to do it using GA4:
- Analyze Conversion Data
- Review Conversion Rates: Check the Events report to see how different actions are performing.
- Segment Data: Use GA4’s Explorations to analyze conversion rates by demographics and traffic sources.
- Identify Bottlenecks
- Funnel Analysis: Create funnel reports to visualize user journeys and spot drop-off points.
- User Behavior Insights: Use the User Explorer report to track individual journeys and identify common paths.
- Improve User Experience
- Optimize Landing Pages: Ensure pages are visually appealing, easy to navigate, and have clear calls to action (CTAs).
- Enhance Load Speed: Use tools like Google PageSpeed Insights to improve page load times.
- Leverage A/B Testing
- Set Up Tests: Use GA4 experiments to test different CTAs, headlines, or layouts and determine which performs best.
- Utilize Retargeting
- Create Custom Audiences: Retarget users who didn’t convert. Use tailored ads to bring them back.
- Optimize Marketing Channels
- Evaluate Traffic Sources: Check which channels drive the most conversions and adjust your focus accordingly.
- Enhance CTAs
- Craft Compelling CTAs: Ensure CTAs are clear and action-oriented. Test different placements for effectiveness.
- Monitor and Iterate
- Regular Reporting: Set up automated reports to keep track of conversion metrics and adjust strategies based on data.
- Engage with Users
- Feedback Mechanisms: Use surveys and live chat to gather user insights and address concerns.
- Focus on Quality Content
- Create Valuable Content: Ensure your content is relevant and engaging. Use visuals to enhance user experience.
Conclusion
Finding and optimizing your conversion rate in GA4 is essential for understanding and enhancing your website’s performance.
By establishing effective conversion tracking, thoroughly analyzing your data, and implementing targeted optimization techniques, you can significantly boost your conversion rates.
This process not only helps you identify what’s working and what needs improvement but also allows you to make informed decisions that can lead to higher engagement and sales.
If you’re looking for expert guidance in digital marketing and conversion tracking, consider Go SEO Monkey’s services. Our expertise can elevate your analytics and optimization efforts, ensuring you achieve your business goals more effectively.
FAQs
- What is a good conversion rate in GA4?
A good conversion rate varies by industry, but a general benchmark is around 2-5%. - How do I track ecommerce conversion rate in GA4?
You can track ecommerce conversion rates by setting up purchase events as conversions and viewing them in the reports. - Can I track multiple conversions in one report?
Yes, GA4 allows you to track and report on multiple conversion events within a single report. - How can I improve my conversion rate in GA4?
Improving user experience, A/B testing, and funnel analysis are some key ways to optimize your conversion rate.

