Table of Contents
ToggleSometimes, not every page on your website is meant to be indexed by search engines. Maybe you have pages with sensitive information, low-quality content, or specific admin sections. In such cases, applying the noindex tag can help prevent these pages from appearing in search engine results. But how do you do that on WordPress? Let’s dive into it!
What Does "Noindex" Mean in SEO?
The term noindex refers to a directive that tells search engines not to include a particular page in their index. When a page is noindexed, it won’t appear in search results, even though it may still be accessible through direct links.
Noindex WordPress Pages Easily and Improve Your Site's SEO!
Our pros make noindexing WordPress pages simple and stress-free!
Why do you noindex a WordPress page?
There are several reasons to use the noindex tag on specific pages, including:
Hiding Private Pages
If you have a membership area or pages with restricted content, you’ll want to ensure that these pages aren’t visible on search engines.
Preventing Low-Quality Content from Indexing
Some pages, such as thank-you pages or low-quality content, can negatively affect your overall site ranking if search engines index them. Applying the noindex tag helps you keep these out of search results.
How WordPress Handles Page Indexing?
By default, WordPress doesn’t automatically noindex any pages. However, you can control which pages are indexed by search engines using plugins or by manually modifying your site’s code.
How to Noindex a Page in WordPress Using Yoast SEO Plugin?
Setting Up Yoast SEO
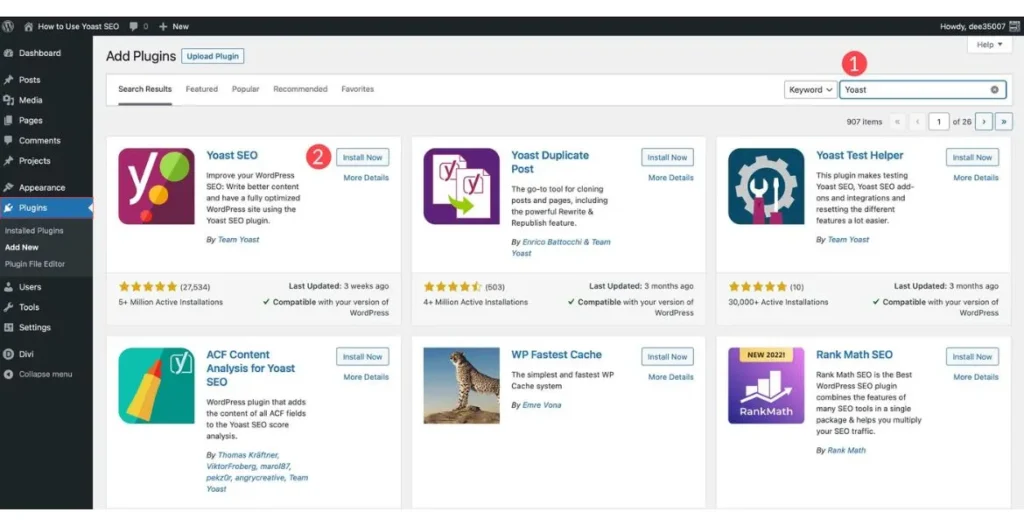
Yoast SEO is a top WordPress plugin for search engine optimization.Follow these guidelines to install and set it up:
- Go to your WordPress dashboard.
- Navigate to Plugins > Add New.
- Find and then install Yoast SEO and then activate the plugin.
Applying Noindex to Individual Pages
Once Yoast SEO is installed, you can apply the noindex tag to specific pages:
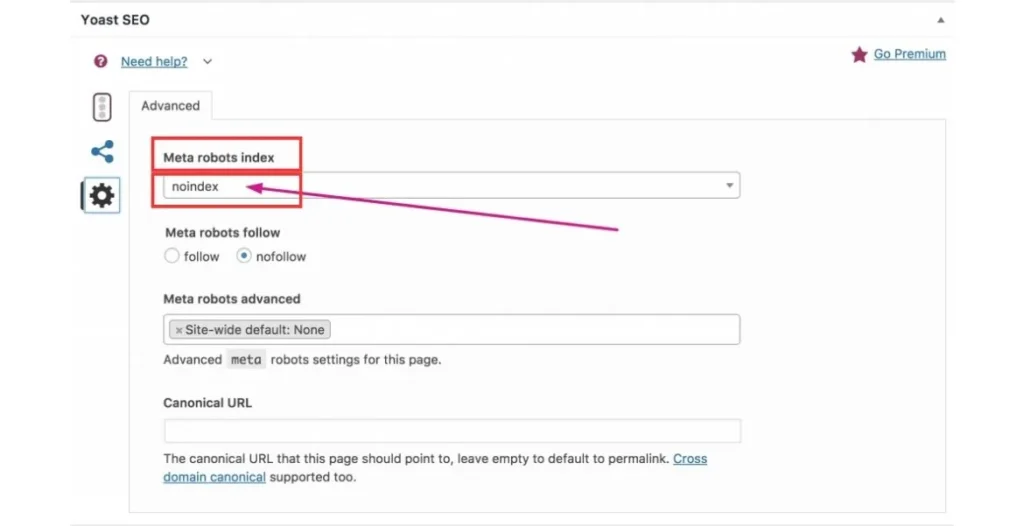
- Edit the page you want to noindex.
- Find Yoast SEO Meta Box.
- Go to the Advanced tab and select No for “Allow search engines to show this Page in search results?”.
- Save the changes, and your page will be noindexed.
How to Noindex a Page in WordPress Using Rank Math SEO Plugin?
Setting Up Rank Math
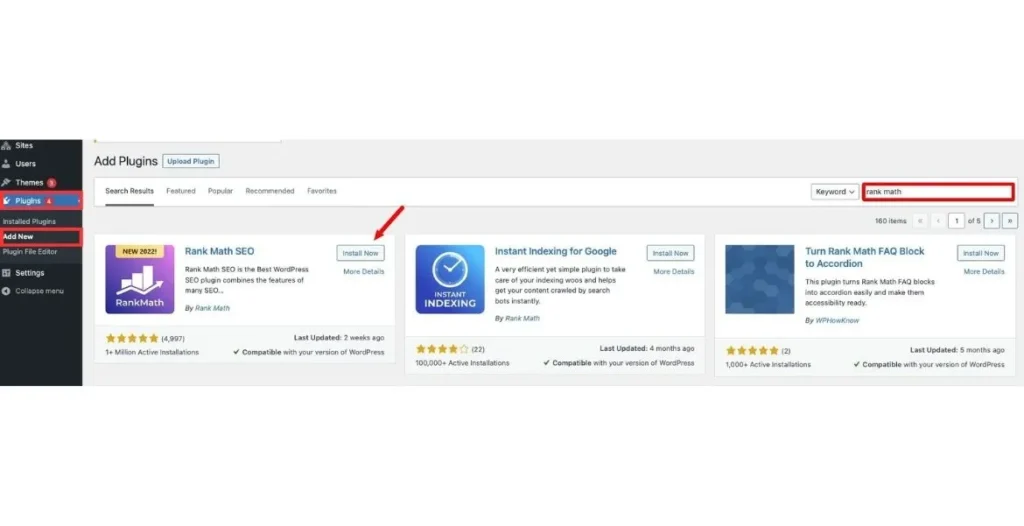
Rank Math is another SEO plugin similar to Yoast, with some advanced features. To install:
- Go to your WordPress dashboard.
- Click on Plugins > Add New.
- Install Rank Math and then activate it.
Noindex Pages with Rank Math
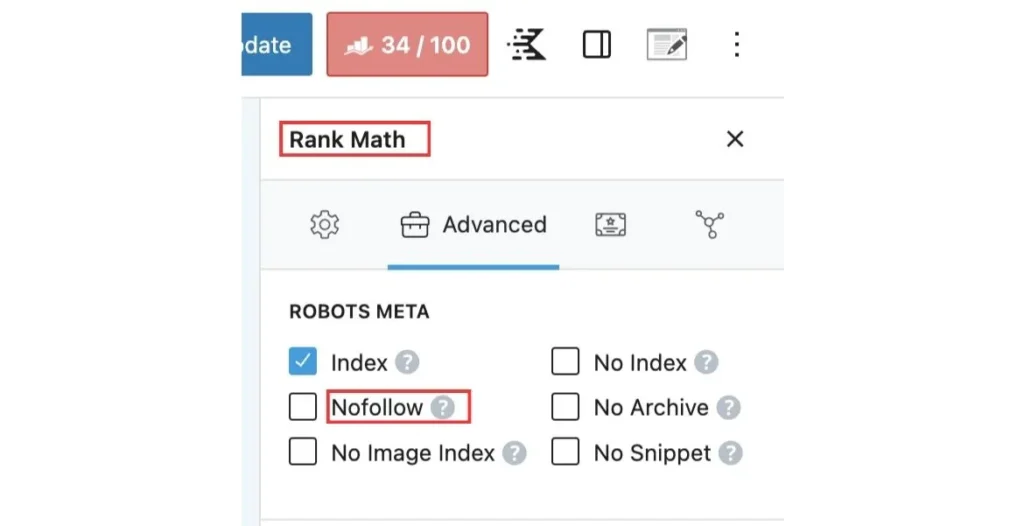
To noindex a page using Rank Math:
- Edit the page you want to noindex.
- Find the Rank Math SEO Meta Box.
- Navigate to the Advanced tab and then switch to Noindex.
- Save your changes.
Manual noindex methods for WordPress
Editing Robots.txt File
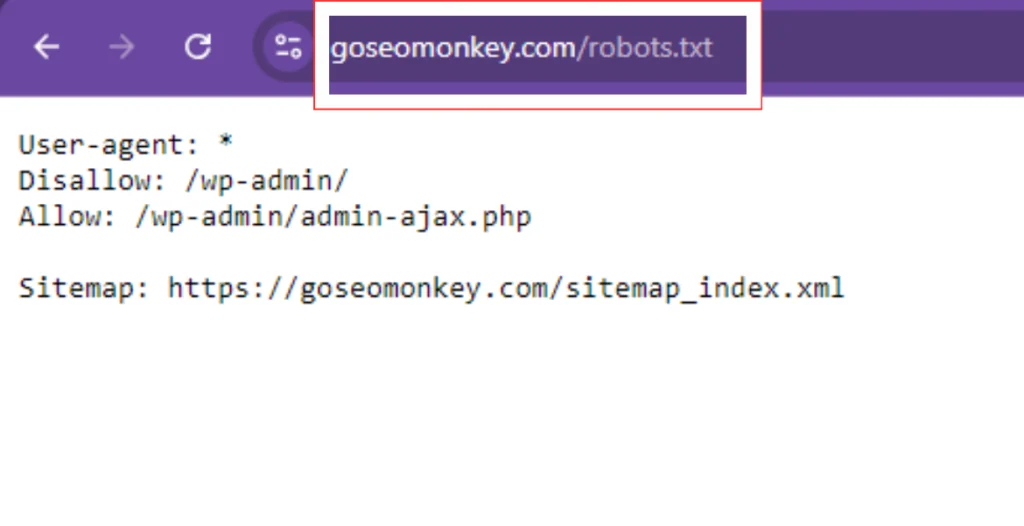
If you prefer not to use a plugin, you can manually add a noindex directive by editing your robots.txt file:
- Navigate WordPress files via FTP.
- Locate the robots.txt file in your root directory.
- Add the following line to the file:
Disallow: /your-page-url/
Adding a Noindex Meta Tag Manually
Another way to noindex a page without a plugin is by adding a noindex meta tag directly to the page’s header. You’ll need to modify your theme’s header.php file and insert this line:
<meta name="robots" content="noindex">
Make sure to wrap it within the appropriate <head> section for the specific page template.

How to Noindex Search Pages in WordPress?
Search pages are generally low-quality content in the eyes of search engines. To noindex these:
Yoast SEO:
- Log in to your WordPress dashboard.
- Go to SEO > Search Appearance.
- Click on Archives.
- Scroll down to Search Pages.
- Select “Noindex” under “Search Pages”.
- Save changes.
Rank Math:
- Log in to your WordPress dashboard.
- Go to Rank Math > General Settings.
- Click on Search Appearance.
- Navigate to Archives > Search Pages.
- Toggle “Noindex” to “Enabled“.
- Save changes.

Guide to Noindex WordPress Image Pages Using Robots.txt
Step 1: Understand the Concept of Noindexing
Noindexing is a method used to prevent search engines from indexing specific pages. This can be useful for image attachment pages that do not contribute significantly to your site’s SEO performance.
Step 2: Log into Your WordPress Dashboard
Start by accessing your WordPress admin area.To access your WordPress dashboard, type your (website.com/wp-admin) in your browser’s address bar and log in securely.
Step 3: Finding the robots.txt File
Check for a robots.txt file on your site by accessing [(link unavailable)]/robots.txt through your preferred browser. If there is no file then you need to create the file first.
Step 4: Creating or Editing the robots.txt File
If you need to create a new robots.txt file, you can use an FTP client or your web host’s file manager. If the file exists, you can open it for editing.
Step 5: Using an SEO Plugin for Convenience
If you prefer not to deal with file editing directly, consider using an SEO plugin like Yoast SEO or Rank Math. These plugins typically have user-friendly options for managing your robots.txt settings.
Step 6: Adding Noindex Rules for Image Pages
To prevent search engines from indexing your image pages, include the following lines in your robots.txt file:
User-agent: *
Disallow: /wp-content/uploads/
This tells all search engine crawlers (noted by User-agent: *) to avoid crawling any files in the /wp-content/uploads/ directory, where WordPress stores uploaded images.
Step 7: Saving Your Edits
Conclude the robots.txt configuration process by saving your edits and affirming any SEO plugin updates through the ‘Apply’ or ‘Save’ options.
Step 8: Confirming Your Changes
After saving, go back to yourwebsite.com/robots.txt to ensure that the new rules appear as intended. This verification step confirms that your modifications were successful.
Step 9: Monitor Indexing Status
Keep in mind that it might take a little while for search engines to recognize your noindex request. You can use Google Search Console to track the indexing status of your pages and confirm that the image pages are no longer indexed.
Step 10: Implementing Good SEO Practices
While it’s important to noindex certain pages, ensure that your key images are optimized with relevant alt text and descriptive file names. This practice helps improve the overall SEO of your website, allowing the images you want to rank to perform better.
Steps to Fix Noindex Pages in WordPress
- Log in to your WordPress Dashboard.
- Navigate to Pages > and the All Pages, and modify the noindexed page.
- In Yoast SEO, switch “Allow search engines to show this Page” to Yes (Advanced tab).
- If using Rank Math, ensure Noindex is Off (Advanced tab).
- Review robots.txt (SEO > Tools/File Editor) for Disallow directives.
- Check crawlability and indexing errors with Google Search Console’s URL Inspection tool.
- Optimize performance by purging caching plugins and browser cache, then test in private mode.

Noindexing Trash Pages: Can You Do It?
You can’t directly noindex trash pages in WordPress because they aren’t visible to the public. However, once a page is moved to trash, it’s automatically excluded from being indexed.
How to Check if Your Pages Are Indexed?
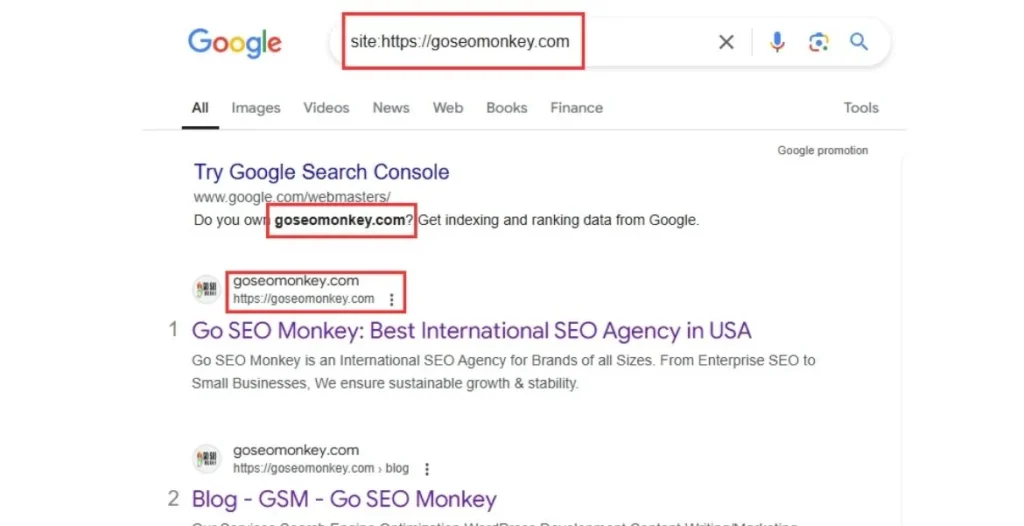
To verify whether a page is indexed:
- Navigate to Google Search Console, log in, and pick your property from the list.
- Enter ‘site:(
site:yourdomain.com/page-url)’ in Google to verify page indexing. - Verify page indexing status in GSC’s URL Inspection tool.
Common Noindex Mistakes and How to Avoid Them
Some common mistakes when noindexing pages include:
- – Error 404: Not Found: This occurs when Google bots try to crawl a page, but it doesn’t exist, or the URL has been changed or deleted. To fix this, update your sitemap whenever you remove or change a URL, and set up proper redirection .
- – Soft 404 Error: This happens when a page returns a 200 OK response, but Google considers it a 404 due to poor content or incorrect server configuration. Ensure proper redirection, mark pages correctly as 404, and configure your server and CMS correctly .
- – URL Blocked by Robot.txt: If you’ve blocked pages using robot.txt, Google crawlers won’t be able to crawl them. Check your robot.txt file and edit it if necessary .
- – Redirect Error: Google bots may encounter errors when redirected to a new URL. Ensure redirects are set up properly to avoid chains, empty URLs, or redirect loops .
- – Discovered but Not Indexed: This issue often occurs with large websites due to crawl budget limitations. Increase crawl budget allocation by creating compelling content, organizing site hierarchy, and removing duplication.
- – Crawled but Not Indexed: Google may choose not to index pages due to site-wide content quality issues, duplicate content, or poor website structure. Optimize your content quality.
Fix noindex problems effectively for stronger SEO results!
Get professional assistance to master Noindex best practices!
Conclusion
Learning how to noindex a page in WordPress is crucial for optimizing your website’s visibility while keeping irrelevant or low-value pages out of search results. By using plugins like Yoast SEO and Rank Math, or manually editing your files, you can easily control which pages get indexed. If you need expert assistance with your WordPress SEO, Go SEO Monkey offers comprehensive services to optimize your website’s performance and search engine ranking.
FAQs
- Can I noindex multiple pages at once in WordPress?
Yes, by using plugins like Yoast SEO, you can bulk-edit multiple pages to noindex them. - How long does it take for Google to remove a noindexed page from its results?
It typically takes a few days to a few weeks for Google to re-crawl and deindex the page. - Will noindexing a page affect my website’s SEO?
Noindexing low-value or private pages can actually improve your overall SEO by focusing search engine attention on more relevant content. - Can I noindex pages without using a plugin?
Yes, you can edit the robots.txt file or add noindex meta tags manually. - What happens if I noindex important pages by mistake?
You can quickly reverse this by removing the noindex directive, and search engines will reindex the page during the next crawl.


